Jailkit solo es necesario si se quiere hacer chroot a usuarios SSH. Advertencia: En el caso de ser usado DEBE instalarse ANTES que el ISPConfig o de lo contrario fallará. Puede instalarse con lo siguiente:
cd /tmp
wget http://olivier.sessink.nl/jailkit/jailkit-2.19.tar.gz
tar xvfz jailkit-2.19.tar.gz
cd jailkit-2.19
./configure
make
make install
cd ..
rm -rf jailkit-2.19*
//
// named.conf
//
// Provided by Red Hat bind package to configure the ISC BIND named(8) DNS
// server as a caching only nameserver (as a localhost DNS resolver only).
//
// See /usr/share/doc/bind*/sample/ for example named configuration files.
//
options {
        listen-on port 53 { any; };
        listen-on-v6 port 53 { any; };
        directory       "/var/named";
        dump-file       "/var/named/data/cache_dump.db";
        statistics-file "/var/named/data/named_stats.txt";
        memstatistics-file "/var/named/data/named_mem_stats.txt";
        allow-query     { any; };
                allow-recursion {"none";};
        recursion no;
};
logging {
        channel default_debug {
                file "data/named.run";
                severity dynamic;
        };
};
zone "." IN {
        type hint;
        file "named.ca";
};
include "/etc/named.conf.local";
Cree el archivo /etc/named.conf.local que se incluye al final de /etc/named.conf (/etc/named.conf.local posteriormente se rellenará con ISPConfig si crea zonas DNS en ISPConfig):
touch /etc/named.conf.local
Luego creamos los enlaces de inicio y arrancamos BIND:
Ahora debemos configurarlo para que acepte sesiones FTP y TLS. FTP es un protocolo muy inseguro porque sus usuarios y contraseñas se transmiten en texto plano. Al usar TLS la comunicación completa es cifrada haciéndolo más seguro.
OpenSSL se requiere para que funcione TLS por lo que para instalarlo ejecutamos:
yum install openssl
Ahora debemos activar TLS en PureFTP, para ello editamos su configuración y lo colocamos en 1:
nano /etc/pure-ftpd/pure-ftpd.conf
y nos aseguramos que TSL este en 1 de la siguiente forma:
[...]
# This option can accept three values :
# 0 : disable SSL/TLS encryption layer (default).
# 1 : accept both traditional and encrypted sessions.
# 2 : refuse connections that don't use SSL/TLS security mechanisms,
#     including anonymous sessions.
# Do _not_ uncomment this blindly. Be sure that :
# 1) Your server has been compiled with SSL/TLS support (--with-tls),
# 2) A valid certificate is in place,
# 3) Only compatible clients will log in.

TLS                      1
[...]
Para poder usar TLS debemos crear un certificado SSL con lo cual primero creamos el directorio:
mkdir /etc/ssl/private/
Ahora podemos crear el certificado SSL ejecutando:
Esto preguntará algunos parámetros a los cuales debemos responder lo siguiente:
 Country Name (2 letter code) [XX]: SIGLAS DEL PAIS
 State or Province Name (full name) []: NOMBRE DEL ESTADO
 Locality Name (eg, city) [Default City]: NOMBRE DE LA CIUDAD
 Organization Name (eg, company) [Default Company Ltd]: NOMBRE DE LA EMPRESA
 Organizational Unit Name (eg, section) []: NOMBRE DEL DEPARTAMENTO
 Common Name (eg, your name or your servers hostname) []: desarrollo1
 Email Address []: EMAIL DEL RESPONSABLE DEL SERVIDOR
Ahora debemos cambiar los permisos al certificado con:
chmod 600 /etc/ssl/private/pure-ftpd.pem
Y finalmente debemos reiniciar el PureFTP:
systemctl restart pure-ftpd.service
Eso es todo. Ahora puede intentar conectarse usando su cliente FTP; Sin embargo, debe configurar su cliente de FTP para que utilice TLS.
El módulo apache mod_python no está disponible como paquete RPM, por lo tanto lo compilaremos desde el origen. El primer paso es instalar los archivos de desarrollo de python y descargar la versión actual de mod_python como archivo tar.gz, para esto ejecutamos los siguientes comandos
yum -y install python-devel

cd /usr/local/src/
wget http://dist.modpython.org/dist/mod_python-3.5.0.tgz
tar xfz mod_python-3.5.0.tgz
cd mod_python-3.5.0
Y luego configurar y compilar el módulo.
./configure
make
Hay un error en el módulo compilado que hará que la instalación falle con el error “version =”fatal: Not a git repository (or any of the parent directories): .git”. Para arreglarlo, ejecute este comando sed en una sola línea.
Luego abrimos /etc/php.ini para cambiar el error reporting, establecer la zona horaria y descomentar cgi.fix_pathinfo=1, ejecutando:
nano /etc/php.ini
Debe quedar como:
[...]
;error_reporting = E_ALL & ~E_DEPRECATED
error_reporting = E_ALL & ~E_NOTICE & ~E_DEPRECATED & ~E_STRICT
[...]
; cgi.fix_pathinfo provides *real* PATH_INFO/PATH_TRANSLATED support for CGI.  PHP''s
; previous behaviour was to set PATH_TRANSLATED to SCRIPT_FILENAME, and to not grok
; what PATH_INFO is.  For more information on PAppp.tldTH_INFO, see the cgi specs.  Setting
; this to 1 will cause PHP CGI to fix its paths to conform to the spec.  A setting
; of zero causes PHP to behave as before.  Default is 1.  You should fix your scripts
; to use SCRIPT_FILENAME rather than PATH_TRANSLATED.
; http://www.php.net/manual/en/ini.core.php#ini.cgi.fix-pathinfo
cgi.fix_pathinfo=1
[...]
date.timezone = 'America/Caracas'
[...]
Habilite httpd y PHP-FPM para que comiencen en el arranque e inicie el servicio PHP-FPM.
mkdir /opt/certbot
cd /opt/certbot
wget https://dl.eff.org/certbot-auto
chmod a+x ./certbot-auto
Ahora ejecute el comando certbot-auto que descargará e instalará el software y sus dependencias.
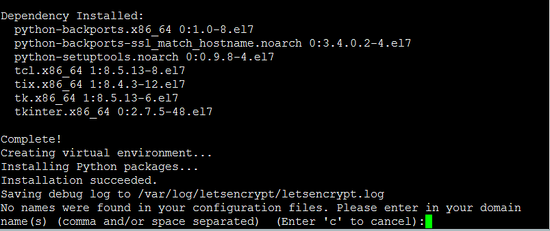
./certbot-auto
El comando le dirá entonces que “no se encontraron nombres en los archivos de configuración” y le pregunta si continuará, por favor seleccione “c” para cancelar aquí ya que los certs serán creados por ispconfig.
Para crear la contraseña del usuario root de MySQL ejecutamos:
mysql_secure_installation
Debemos responder a las preguntas con las acciones resaltadas en negrilla:
NOTE: RUNNING ALL PARTS OF THIS SCRIPT IS RECOMMENDED FOR ALL MariaDB SERVERS IN PRODUCTION USE! PLEASE READ EACH STEP CAREFULLY!
In order to log into MariaDB to secure it, we''ll need the current password for the root user. If you''ve just installed MariaDB, and you haven''t set the root password yet, the password will be blank, so you should just press enter here.
Enter current password for root (enter for none):'presione ENTER' OK, successfully used password, moving on...
Setting the root password ensures that nobody can log into the MariaDB root user without the proper authorisation.
Set root password? [Y/n] 'presione ENTER' New password: 'Coloque su clave de root de la base de datos y anótela, luego ENTER' Re-enter new password: 'Coloque de nuevo su clave de root de la base de datos, luego ENTER' Password updated successfully! Reloading privilege tables.. ... Success!
By default, a MariaDB installation has an anonymous user, allowing anyone to log into MariaDB without having to have a user account created for them. This is intended only for testing, and to make the installation go a bit smoother. You should remove them before moving into a production environment.
By default, MariaDB comes with a database named ''test'' that anyone can access. This is also intended only for testing, and should be removed before moving into a production environment.
Remove test database and access to it? [Y/n] 'presione ENTER' - Dropping test database... ... Success! - Removing privileges on test database... ... Success!
Reloading the privilege tables will ensure that all changes made so far will take effect immediately.
All done! If you''ve completed all of the above steps, your MariaDB installation should now be secure.
Thanks for using MariaDB![root@desarrolloN tmp]#
Ahora debemos configurar phpMyAdmin para que acepte conexiones adicionales a localhost, comentando la sección <Directory “/usr/share/phpmyadmin”> en:
nano /etc/httpd/conf.d/phpMyAdmin.conf
Debe quedar como:
# phpMyAdmin - Web based MySQL browser written in php
#
# Allows only localhost by default
#
# But allowing phpMyAdmin to anyone other than localhost should be considered
# dangerous unless properly secured by SSL

Alias /phpMyAdmin /usr/share/phpMyAdmin
Alias /phpmyadmin /usr/share/phpMyAdmin

<Directory /usr/share/phpMyAdmin/>
   <IfModule mod_authz_core.c>
     # Apache 2.4
     <RequireAny>
     #  Require ip 127.0.0.1
     #  Require ip ::1
        Require all granted
     </RequireAny>
   </IfModule>
   <IfModule !mod_authz_core.c>
     # Apache 2.2
     Order Deny,Allow
     Deny from All
     Allow from 127.0.0.1
     Allow from ::1
   </IfModule>
</Directory>
Ahora cambiamos la autenticación de phpMyAdmin de cookie a http con:
nano /etc/phpMyAdmin/config.inc.php
Debe quedar como:
[...]
/* Authentication type */
$cfg['Servers'][$i]['auth_type'] = 'http';
[...]
Ahora se crean los enlaces de arranque del Apache y se inicia:
Ahora podemos usar un navegador para entrar por http://desarrolloN/phpmyadmin/ o por http://192.168.1.X/phpmyadmin/ (donde N es el número del servidor y X es el número de la IP asignada)e ingresar con el usuario root y la nueva contraseña del usuario root de MySQL que hemos creado.
Inhabilitamos a sendmail para asegurarnos de que no se inicie en caso de que esté instalado en su servidor. Por lo tanto, el mensaje de error “Error al emitir la llamada al método: Unit sendmail.service not loaded.” Puede ser ignorado.